
[hide=50]
Ok, I'm going to tell you how to create the most basic of WinAPI programs and then give a intense description of the code and what it does... So let's begin:
Step one:
 -
-
Step two:
 -
-
Step three:
 -
-
Step four:
 -
-
Step five:
 -
-
Step six:
 -
-
Step seven:
 -
-
You're probably eager to get coding after all that hard setup. Well, now's the time.
Either copy and paste or type this code into your IDE.
Run the program to make sure it works by going up to the toolbar and hitting the icon that looks like the play button on a remote. The hover text should say 'Start Debugging (f5)'.
Congrats. You've programmed your first WinAPI program. Now let's get into how it works...
This just includes all the components needed to make a program with Windows API.
This defines WndProc for use in the WinMain function.
This starts the WinMain function. It's where everything is predefined so it can all be used in the second WndProc call.
These are just some variables. szAppName is the user-defined appname. hwnd is the variable for HWND. Same for msg and wc.
Hopefully you can guess what this does... If not, it is just piecing the window together beforehand and setting all the variables. What I have is usually standard and not needed to edit when you're a beginner.
This just checks to see if the window registers correctly. If not, the program displays a message box informing the user the program failed to register. Then it terminates all processes the program created.
This is the CreateWindow function. It contains variables for size, Window title, type of window, and other assorted things.
This is the main message loop. While the program is running it loops through this.
This is the second WndProc calling. In the switch you write all the code for your program in certain cases that are predefined by the Windows.h header file.
[/hide]
Well that's the absolute basics of WinAPI. Expect more tutorials from me on this subject as I improve my skills.
Intensive intro to WinAPI
By Carolus Magnus
Ok, I'm going to tell you how to create the most basic of WinAPI programs and then give a intense description of the code and what it does... So let's begin:
Part one: Setting up the IDE to edit the code correctly
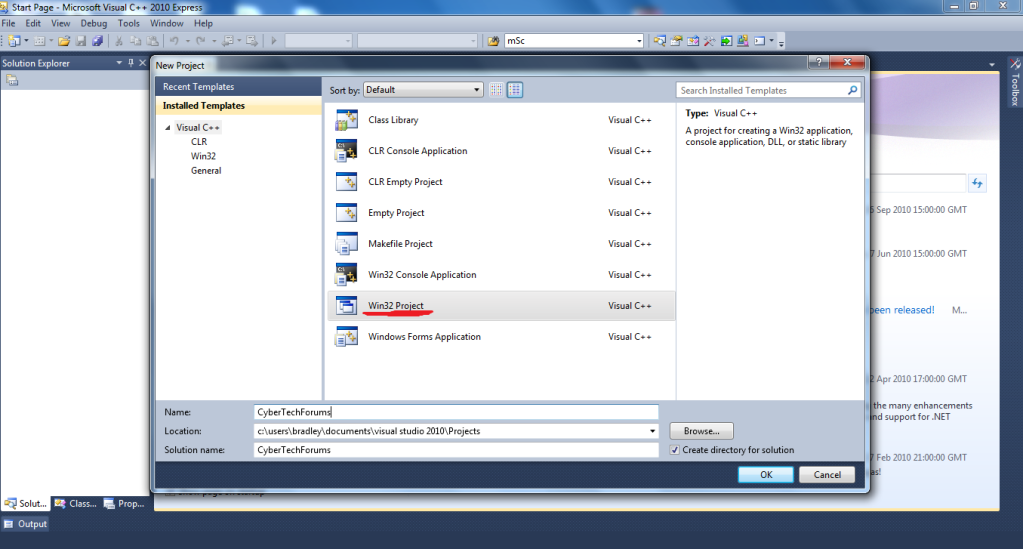
Step one:
- Create a new project in Visual C++ by hitting "New Project"
Step two:
- Create a new Win32 Project. Name it whatever you want.
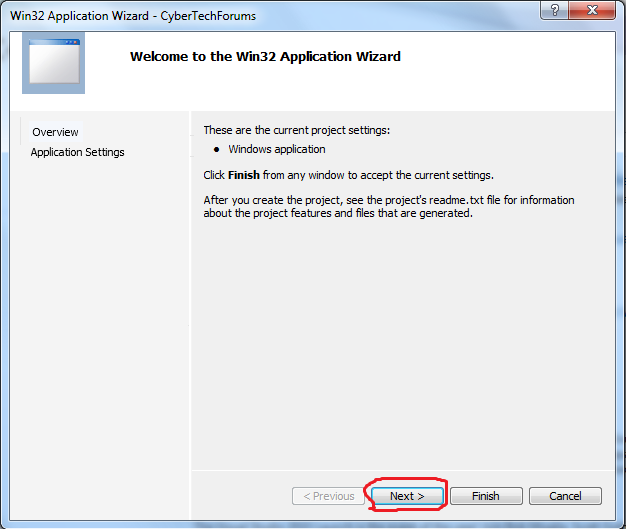
Step three:
- When this screen comes up hit 'next'
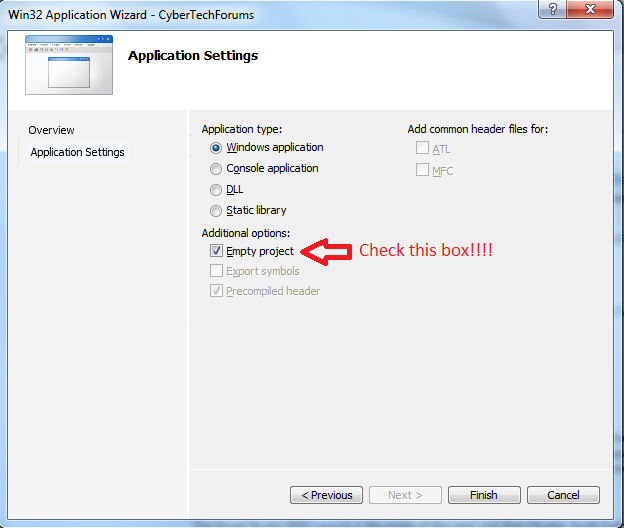
Step four:
- Check 'Empty Project'
- Hit finish
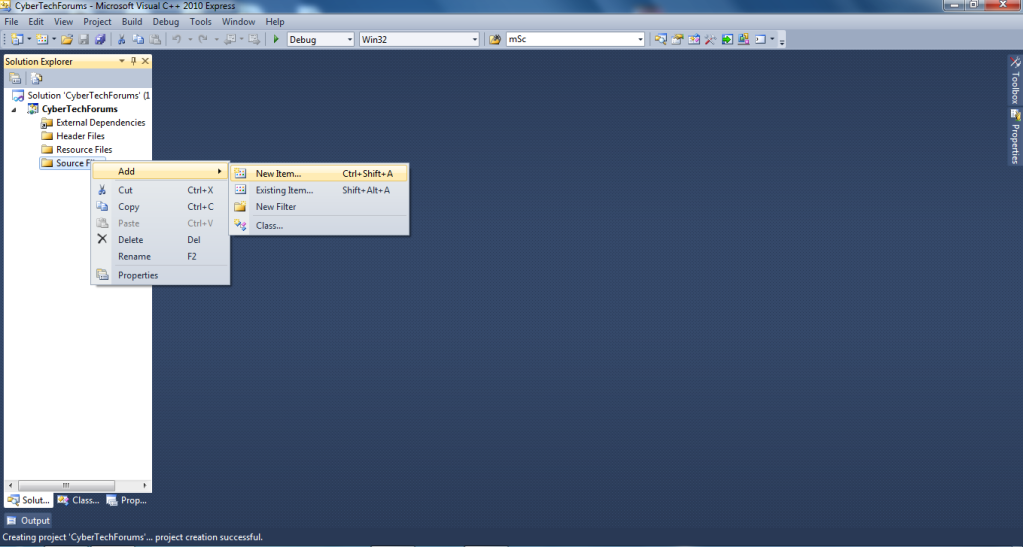
Step five:
- Right click source files
- Hover over 'Add'
- Click 'New item'
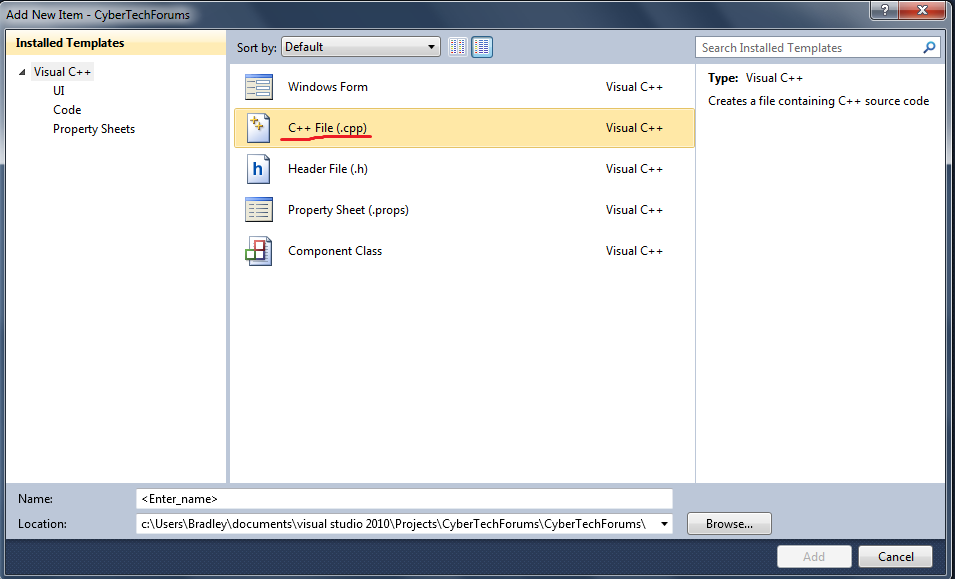
Step six:
- Click C++ file
- Name it whatever you want
- Hit Add
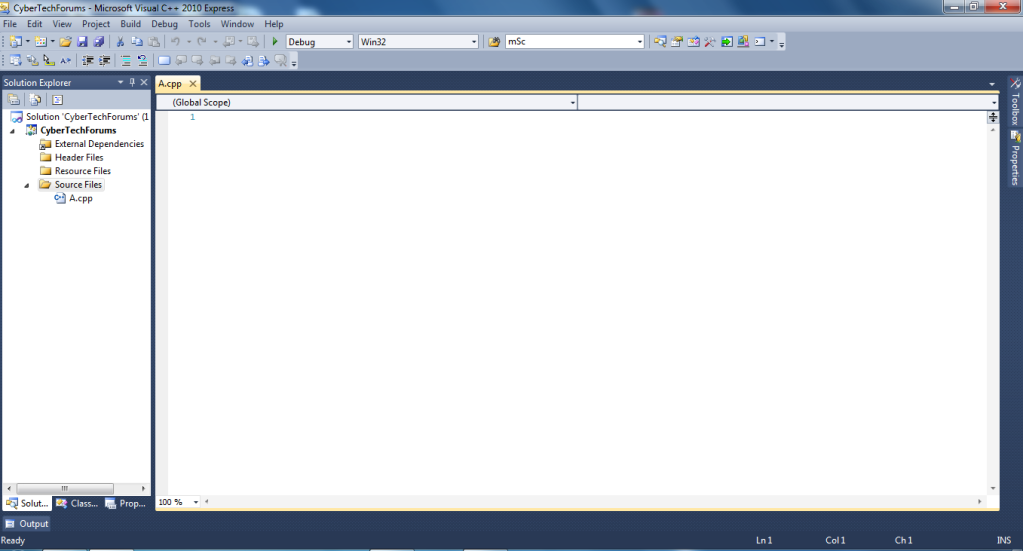
Step seven:
- Congrats! You're now ready for the programming portion of this tutorial!
- Your screen should look like the picture below:
Part Two: Coding
You're probably eager to get coding after all that hard setup. Well, now's the time.
Either copy and paste or type this code into your IDE.
Run the program to make sure it works by going up to the toolbar and hitting the icon that looks like the play button on a remote. The hover text should say 'Start Debugging (f5)'.
Congrats. You've programmed your first WinAPI program. Now let's get into how it works...
Part Three: In-depth
Code:
#include <Windows.h>This just includes all the components needed to make a program with Windows API.
Code:
LRESULT CALLBACK WndProc(HWND, UINT, WPARAM, LPARAM);This defines WndProc for use in the WinMain function.
Code:
int WINAPI WinMain(HINSTANCE hInstance, HINSTANCE hPrevInstance, PSTR szCmdLine, int iCmdShow)This starts the WinMain function. It's where everything is predefined so it can all be used in the second WndProc call.
Code:
static TCHAR szAppName[] = TEXT("App Name");
	HWND hwnd;
	MSG msg;
	WNDCLASS wc;
These are just some variables. szAppName is the user-defined appname. hwnd is the variable for HWND.
Same for msg and wc.
Code:
wc.style = CS_HREDRAW |CS_VREDRAW;
wc.lpfnWndProc = WndProc;
wc.cbClsExtra = 0;
wc.cbWndExtra = 0;
wc.hInstance = hInstance;
wc.hIcon = LoadIcon(NULL, IDI_APPLICATION);
wc.hCursor = LoadCursor(NULL, IDC_ARROW);
wc.hbrBackground = (HBRUSH) GetStockObject(WHITE_BRUSH);
wc.lpszMenuName = NULL;
wc.lpszClassName = szAppName;
Hopefully you can guess what this does... If not, it is just piecing the window together beforehand and setting all the variables. What I have is usually standard and not needed to edit when you're a beginner.
Code:
if(!RegisterClass(&wc))
	{
		MessageBox(NULL, TEXT("Piss! Something went wrong!"), szAppName, MB_ICONERROR);
		return 0;
	}
This just checks to see if the window registers correctly. If not, the program displays a message box informing the user the program failed to register. Then it terminates all processes the program created.
Code:
hwnd = CreateWindow(szAppName, TEXT("CTF Tutorial Window"), WS_OVERLAPPEDWINDOW, CW_USEDEFAULT, CW_USEDEFAULT, CW_USEDEFAULT, CW_USEDEFAULT, NULL, NULL, hInstance, NULL);This is the CreateWindow function. It contains variables for size, Window title, type of window, and other assorted things.
Code:
while(GetMessage(&msg, NULL, 0, 0))
	{
		TranslateMessage(&msg);
		DispatchMessage(&msg);
	}
This is the main message loop. While the program is running it loops through this.
Code:
LRESULT CALLBACK WndProc(HWND hwnd, UINT message, WPARAM wParam, LPARAM lParam)
{
	switch(message)
	{
		case WM_CREATE:
			return 0;
		case WM_DESTROY:
			PostQuitMessage(0);
			return 0;
	}

	return DefWindowProc(hwnd, message, wParam, lParam);
}
This is the second WndProc calling. In the switch you write all the code for your program in certain cases that are predefined by the Windows.h header file.
[/hide]
Well that's the absolute basics of WinAPI. Expect more tutorials from me on this subject as I improve my skills.
